Fence Staining and Sealing: A Comprehensive Guide to Revitalizing Your Wooden Fences
A well-stained and sealed wooden fence not only enhances the aesthetic appeal of your outdoor space but also protects your investment. This comprehensive guide delves into the intricacies of fence staining and sealing, offering valuable insights for both beginners and seasoned DIY enthusiasts. From understanding the benefits and exploring various stain types to step-by-step application instructions and maintenance tips, we equip you with the knowledge to transform and preserve your wooden fences beautifully.
- Understanding Fence Staining: Benefits and Types
- Preparing Your Wooden Fence for Staining
- Choosing the Right Stain: Color and Finish
- Applying Fence Stain: Step-by-Step Guide
- Sealing for Protection: Why and How
- Maintenance Tips for Longevity of Stained Fences
Understanding Fence Staining: Benefits and Types
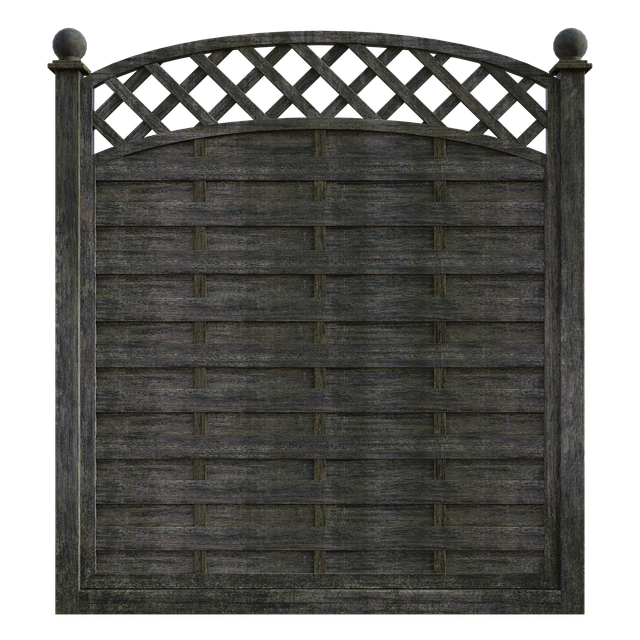
Fence staining is a process that enhances the appearance and longevity of wooden fences. It involves applying a protective finish to the wood, which can be achieved through various methods and materials. The primary benefits include increased durability, improved resistance to weather conditions, and enhanced aesthetics. Staining also helps in preserving the natural beauty of the wood by selecting colors that complement your outdoor space.
There are two main types of fence staining: semi-transparent and solid (or opaque). Semi-transparent stains allow a portion of the natural wood grain to show through, providing a subtle color enhancement while still allowing some light penetration. Solid stains, on the other hand, create a more dramatic effect by blocking light and covering the wood entirely with color. Each type serves different purposes, catering to specific needs and preferences for both functional and aesthetic reasons.
Preparing Your Wooden Fence for Staining
Before applying stain or sealant, it’s crucial to prepare your wooden fence thoroughly. Start by cleaning the fence to remove any dirt, dust, or debris. Use a pressure washer or a stiff brush and mild detergent for this process. Ensure the wood is dry completely before proceeding.
Next, repair any damaged sections of the fence using suitable wood putty and a fine-grit sandpaper. Sand the entire surface of the fence to create a rough texture that will help the stain penetrate better. Remove all dust after sanding using a damp cloth or vacuum to prevent it from interfering with the staining process.
Choosing the Right Stain: Color and Finish
When selecting a fence stain, one of the most crucial decisions is choosing the right color and finish. Fences can vary greatly in their natural shade and grain, so picking a stain that complements your wooden fence’s unique characteristics is essential. Consider the existing color of your fence and the desired ambiance you want to create. Warmer tones like browns and reds can add depth and a rustic feel, while cooler grays and blacks provide a sleek, modern look.
Additionally, decide on the finish you prefer—natural, semi-transparent, or solid. A natural finish lets the wood’s grain show through, offering a subtle and organic appearance. Semi-transparent stains provide better color coverage while still allowing some of the wood’s natural beauty to peek through. Solid stains offer complete color saturation, creating a vibrant, uniform finish that hides the wood’s natural patterns.
Applying Fence Stain: Step-by-Step Guide
Applying fence stain is a process that involves several steps to ensure even coverage and optimal protection for your wooden fence. First, clean the fence surface thoroughly to remove any dirt, dust, or debris using a pressure washer or a mild detergent solution. This step is crucial as it prepares the wood, allowing the stain to adhere better.
Next, choose the appropriate type of fence stain based on your desired color and protection level. Stir the stain well before application, as some types may settle over time. Using a brush or a roller, apply the stain evenly across the wooden surface, working in small sections at a time. Ensure even coverage by overlapping strokes slightly with each pass. Allow the stain to dry according to the manufacturer’s instructions before adding a sealer for extra protection and longevity.
Sealing for Protection: Why and How
Wooden fences, over time, can be susceptible to the elements, leading to wear and tear. Sealing is an essential step in fence maintenance to protect your investment. It creates a protective barrier between the wood and external factors like rain, UV rays, and extreme temperatures. This barrier helps prevent water penetration, which could cause rot and damage.
Sealing also fills in any pores or cracks in the wood’s surface, blocking out dirt, mold, and mildew. By choosing a good quality sealant, you can ensure your fence remains vibrant and durable for years. It’s a simple yet effective way to keep your wooden fences looking their best while protecting them from the harsh effects of weather conditions.
Maintenance Tips for Longevity of Stained Fences
Regular maintenance is key to keeping your stained fence looking its best and ensuring its longevity. After the initial staining process, it’s essential to establish a routine cleaning and re-staining schedule. This involves periodically cleaning the fence to remove any dirt, dust, or debris that may have accumulated, especially in areas with heavy foot traffic or exposure to harsh weather conditions. Use a soft brush or sponge and mild soap to gently clean the surface without damaging the stain.
Additionally, it’s recommended to re-apply a fresh coat of stain every 2-3 years, depending on factors like climate and sunlight exposure. This step helps to refresh the color, protect against fading, and prevent the wood from drying out or becoming vulnerable to rot and insect damage. Regular maintenance not only preserves the aesthetic appeal of your fence but also ensures its structural integrity for years to come.