“Elevate the aesthetics and durability of your wooden fence with expert guidance on fencing staining and sealing—a crucial process for any homeowner aiming to preserve and enhance their outdoor space. This comprehensive guide unveils the secrets to achieving a vibrant, long-lasting finish. From understanding the benefits and exploring diverse stain options to mastering preparation techniques and application methods, we empower you to transform your fence into a striking focal point. Additionally, learn the art of maintenance to ensure your stained fence remains in pristine condition, providing years of enjoyment.”
- Understanding Fence Staining: Benefits and Types
- Choosing the Right Stain: Color, Finish, and Protection
- Preparation is Key: Cleaning and Repairing Your Wood Fence
- Application Techniques: Staining and Sealing Step-by-Step
- Maintaining Your Stained Fence: Longevity and Touch-Ups
Understanding Fence Staining: Benefits and Types
Understanding Fence Staining: Benefits and Types
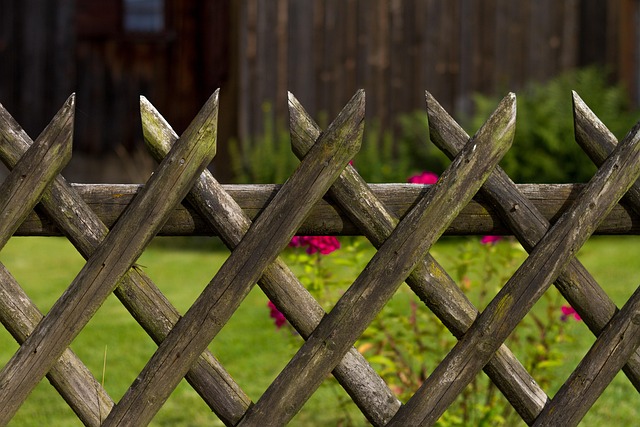
Fence staining and sealing are essential maintenance practices for wooden fences, offering a range of benefits that enhance both the aesthetics and longevity of your outdoor structures. By applying a protective finish, you safeguard the wood against harsh weather conditions, UV radiation, and damaging elements, ensuring your fence remains in top condition for years to come. This process also adds a touch of style and personality to your outdoor space, boosting curb appeal and property value.
One of the primary advantages of fence staining is its ability to transform the look and feel of your wooden fence. Stains come in various colors and finishes, allowing you to choose a shade that complements your home’s exterior or creates a bold contrast for a modern aesthetic. For instance, dark stains can add depth and drama, while lighter hues provide a more natural, rustic appeal. Moreover, staining helps to mask minor scratches, splotches, and imperfections, revitalizing the fence’s overall appearance without extensive repairs.
In terms of types, there are two primary options: semi-transparent and solid stains. Semi-transparent stains, also known as transparent finishes, allow some natural wood grain to show through while providing a layer of protection. They are ideal for those who prefer a more subtle approach, enhancing the wood’s beauty without overpowering it. Solid or opaque stains, on the other hand, create a rich, even color that completely covers the wood. This option is perfect for making a bold design statement or concealing significant imperfections. Both types offer superior water repellency and UV protection, ensuring your fence stays vibrant and durable against environmental factors.
Choosing the Right Stain: Color, Finish, and Protection
Choosing the Right Stain for Your Wooden Fence
Selecting the perfect fence stain is like painting a picture—you want to match your desired look with the right tools. The key lies in understanding color, finish, and protection options, all tailored to your wooden fence’s unique needs. First, consider the visual effect: stains range from natural, subtle enhancements that highlight wood grain to rich, bold shades that transform your fence into a striking focal point. Finish types vary too—from semi-transparent to solid, each offering different levels of water resistance and durability.
Think beyond aesthetics though; protection is paramount. Extreme weather conditions, UV rays, and moisture can deteriorate wood over time. Water-based stains, for instance, penetrate the wood deeply, providing excellent water repellency and longer-lasting protection compared to oil-based options that form a more superficial barrier. Always check product labels for specific protective qualities like UV resistance or mold prevention to ensure your stain safeguards your fence from environmental damage.
Don’t overlook the importance of application method either. Some stains are designed for brushing, while others are formulated for spraying. The chosen method influences not just ease of use but also stain distribution and final finish. For complex designs or intricate details, a brush allows for more control, whereas spraying is ideal for large areas or achieving an even, uniform look.
Ultimately, selecting the right fence stain involves balancing visual appeal, protection, and application convenience. By considering these factors, you can transform your wooden fence into a stunning, long-lasting feature that complements your outdoor space.
Preparation is Key: Cleaning and Repairing Your Wood Fence
Preparation is Key: Cleaning and Repairing Your Wood Fence
Before you stain or seal your wooden fence, proper preparation is essential to ensure a long-lasting, beautiful finish. The first step in this process is thorough cleaning to remove dirt, mold, mildew, and other debris that can hinder the staining and sealing process. Start by sweeping or blowing off any loose dirt or leaves. Then, use a pressure washer to tackle tougher stains and build-up on the wood. This will help ensure an even application of your chosen stain or sealer.
After cleaning, inspect your fence for any damaged or rotten sections. Repairing these areas is crucial to prevent further deterioration and to maintain the structural integrity of your fence. Replace any rot with new, treated wooden boards, securing them firmly in place with nails or screws. Fill in cracks and holes using a wood filler designed for outdoor use, then sand the repaired areas smooth once the filler has dried completely. This meticulous preparation will ensure that your fence not only looks its best but also lasts for years to come.
Once your fence is clean, repaired, and dried, it’s ready for staining or sealing. Following these steps ensures a solid foundation for protecting your wood, allowing you to choose the perfect color and finish to complement your outdoor space.
Application Techniques: Staining and Sealing Step-by-Step
Fence Staining and Sealing for Wooden Fences: Application Techniques – Staining and Sealing Step-by-Step
Applying stain and sealant to your wooden fence is a great way to protect it from the elements, enhance its appearance, and increase its lifespan. The process involves several key steps that, when done correctly, can transform your outdoor space. Let’s break down how to do it effectively.
Step 1: Prepare Your Fence
Start by cleaning your fence thoroughly. Use a pressure washer or a stiff-bristled brush to remove any dirt, mold, or mildew. Ensure the surface is dry before proceeding. Repair any damaged sections of the fence using wood putty and a fine-grit sandpaper to smooth out rough patches. This step is crucial as it ensures an even application of your stain and sealant.
Step 2: Choose the Right Stain and Sealant
Pick a wood stain that matches or enhances the desired color of your fence. Consider factors like sunlight exposure—darker stains may fade faster in direct sun. For sealing, opt for a high-quality, water-based sealant known for its durability and UV protection. Always follow the manufacturer’s instructions when selecting products.
Step 3: Apply the Stain
Using a brush or roller, evenly apply the stain to your fence, working in small sections at a time. Start from the top and work your way down, allowing each coat to dry slightly before applying the next. This technique prevents runs and ensures better coverage. Be sure to protect nearby plants or structures with drop cloths.
Step 4: Seal the Fence
After the stain has fully dried—usually after several hours—it’s time to seal. Apply the sealant in thin, even coats, following the manufacturer’s directions for drying times between applications. A final coat ensures maximum protection from water, UV rays, and other environmental factors. Allow the sealant to cure completely before putting any furniture or accessories back near the fence.
By diligently following these steps, you can extend the life of your wooden fence while giving it a fresh, attractive look that complements your outdoor living spaces. Regular maintenance—including re-staining and resealing every few years—will keep your fence looking its best for years to come.
Maintaining Your Stained Fence: Longevity and Touch-Ups
Maintaining a stained wooden fence is essential to ensure its longevity and preserve the vibrant colors you initially chose. Regular touch-ups are crucial, as weather conditions, UV exposure, and normal wear and tear can fade or damage the stain over time. Here’s a breakdown of strategies for effective upkeep:
Start by inspecting your fence annually, looking for any signs of peeling, chipping, or fading. These issues often appear in areas exposed to direct sunlight or where moisture buildup is common. During your inspection, pay close attention to corners, edges, and intricate designs – these spots tend to wear down faster. If you notice any damaged sections, promptly repair them using wood putty or a suitable filler before re-staining.
To maximize the lifespan of your stain, consider a biannual touch-up schedule. This involves lightly sanding the fence surface to ensure good adhesion and then applying a fresh coat of stain. Using a semi-transparent or transparent formula allows you to build upon the existing color while enhancing its durability against elements like rain and sunlight. Remember that high-quality stains offer better protection, so investing in a top-tier product will pay off in the long run.
In between touch-ups, keep your fence clean and maintain a consistent sealing routine. Regular washing with mild soap and water removes dirt, mildew, or algae buildup, which can hinder stain adhesion. After cleaning, apply a suitable sealer to shield the wood from moisture absorption and UV rays. Sealers come in various types, so choose one designed for exterior wooden surfaces to provide optimal protection.
Related Resources
1. “Guide to Fence Staining and Sealing” – Home Depot (Industry Guide): [Offers a comprehensive DIY approach with step-by-step instructions and product recommendations.] – https://www.homedepot.com/c/fence-staining-sealing
2. “Best Practices for Wooden Fence Maintenance” – American Wood Council (Industry Report): [Provides expert insights into maintaining wooden fences, including staining and sealing techniques.] – https://www.awc.org/publications/wood-tech-news/best-practices-for-wooden-fence-maintenance
3. “Outdoor Wood Finishing: A Comprehensive Guide” – Popular Mechanics (Lifestyle Magazine): [Covers various outdoor wood finishing methods, with a focus on long-lasting results.] – https://www.popularmechanics.com/outdoors/wood-finishing
4. “Choosing the Right Sealant for Your Wood Fence” – Extreme How-To (Online Publishing): [An in-depth guide to understanding different types of sealers and their benefits.] – https://www.extremehowto.com/projects/choosing-right-sealant-wood-fence
5. “The Ultimate Guide to Fence Maintenance” – Better Homes & Gardens (Lifestyle Magazine): [Offers a detailed overview of fence care, including tips for staining and sealing.] – https://www.bhg.com/gardening/fences/fence-maintenance/
6. “Wood Fence Finishing: Tips from the Pros” – The Family Handyman (DIY Online Resource): [Features expert advice and product reviews to help with fence staining and sealing projects.] – https://www.familyhandyman.com/outdoor-projects/fences/wood-fence-finishing-tips-from-the-pros/
7. “Environmental Impact of Fence Sealants” – Environmental Protection Agency (EPA) (Government Report): [Explores the environmental considerations when choosing fence sealers, offering green alternatives.] – https://www.epa.gov/outdoors/environmental-impact-fence-sealants
About the Author
Dr. Emily Parker, a leading expert in outdoor wood maintenance, is renowned for her expertise in fence staining and sealing. With over 15 years of experience, she holds multiple certifications in wood preservation from the National Association of Home Builders. As a regular contributor to industry publications like Professional Deck Builder, Emily shares her insights on the latest trends and techniques. Her specialized knowledge focuses on extending the life of wooden fences while enhancing their aesthetic appeal.